As when installing a stable version, using conda is recommended.
To actively contribute to Calliope development, or simply track the latest development version, you’ll instead want to clone our GitHub repository. This will provide you with the master branch in a known location on your local device.
Then install all development requirements for Calliope into a new environment, calling it e.g. calliope_dev, followed by installing Calliope itself as an editable installation with pip:
$ cd calliope
$ conda config --add channels conda-forge # since we cannot explicitly request it with `conda env update`, we add the `conda-forge` package channel to the user's conda configuration file.$ conda create -n calliope_dev python=3.9 # to ensure the correct python version is installed$ conda env update -f requirements.yml -n calliope_dev # to install the calliope non-python dependencies and testing/coverage python packages$ conda env update -f requirements.txt -n calliope_dev # to install the pinned calliope python dependencies$ conda activate calliope_dev
$ pip install -e . # installs from your local clone of the calliope repository
Only calliope itself should be installed from pip, the rest will have been installed from conda and will be marked as Requirement already satisfied on running the above command.
Note
Most of our tests depend on having the CBC solver also installed, as we have found it to be more stable than GPLK. If you are running on a Unix system, then you can run condainstallcoincbc to also install the CBC solver. To install solvers other than CBC, and for Windows systems, see our solver installation instructions.
We use the code formatter black and before you contribute any code, you should ensure that you have run it through black. If you don’t have a process for doing this already, you can install our configured pre-commit hook which will automatically run black on each commit:
As of version 0.6.0, dynamic loading of custom constraint generator extensions has been removed due it not not being used by users of Calliope. The ability to dynamically load custom functions to adjust time resolution remains (see below).
Custom functions that adjust time resolution can be loaded dynamically during model initialisation. By default, Calliope first checks whether the name of a function or time mask refers to a function from the calliope.core.time.masks or calliope.core.time.funcs module, and if not, attempts to load the function from an importable module:
Worried about delving into the Calliope code? Confused by the structure? Fear not! The package is structured as best as possible to follow a clear workflow, which takes inputs on a journey from YAML and CSV files, via Pyomo objects, to a NetCDF file of results.
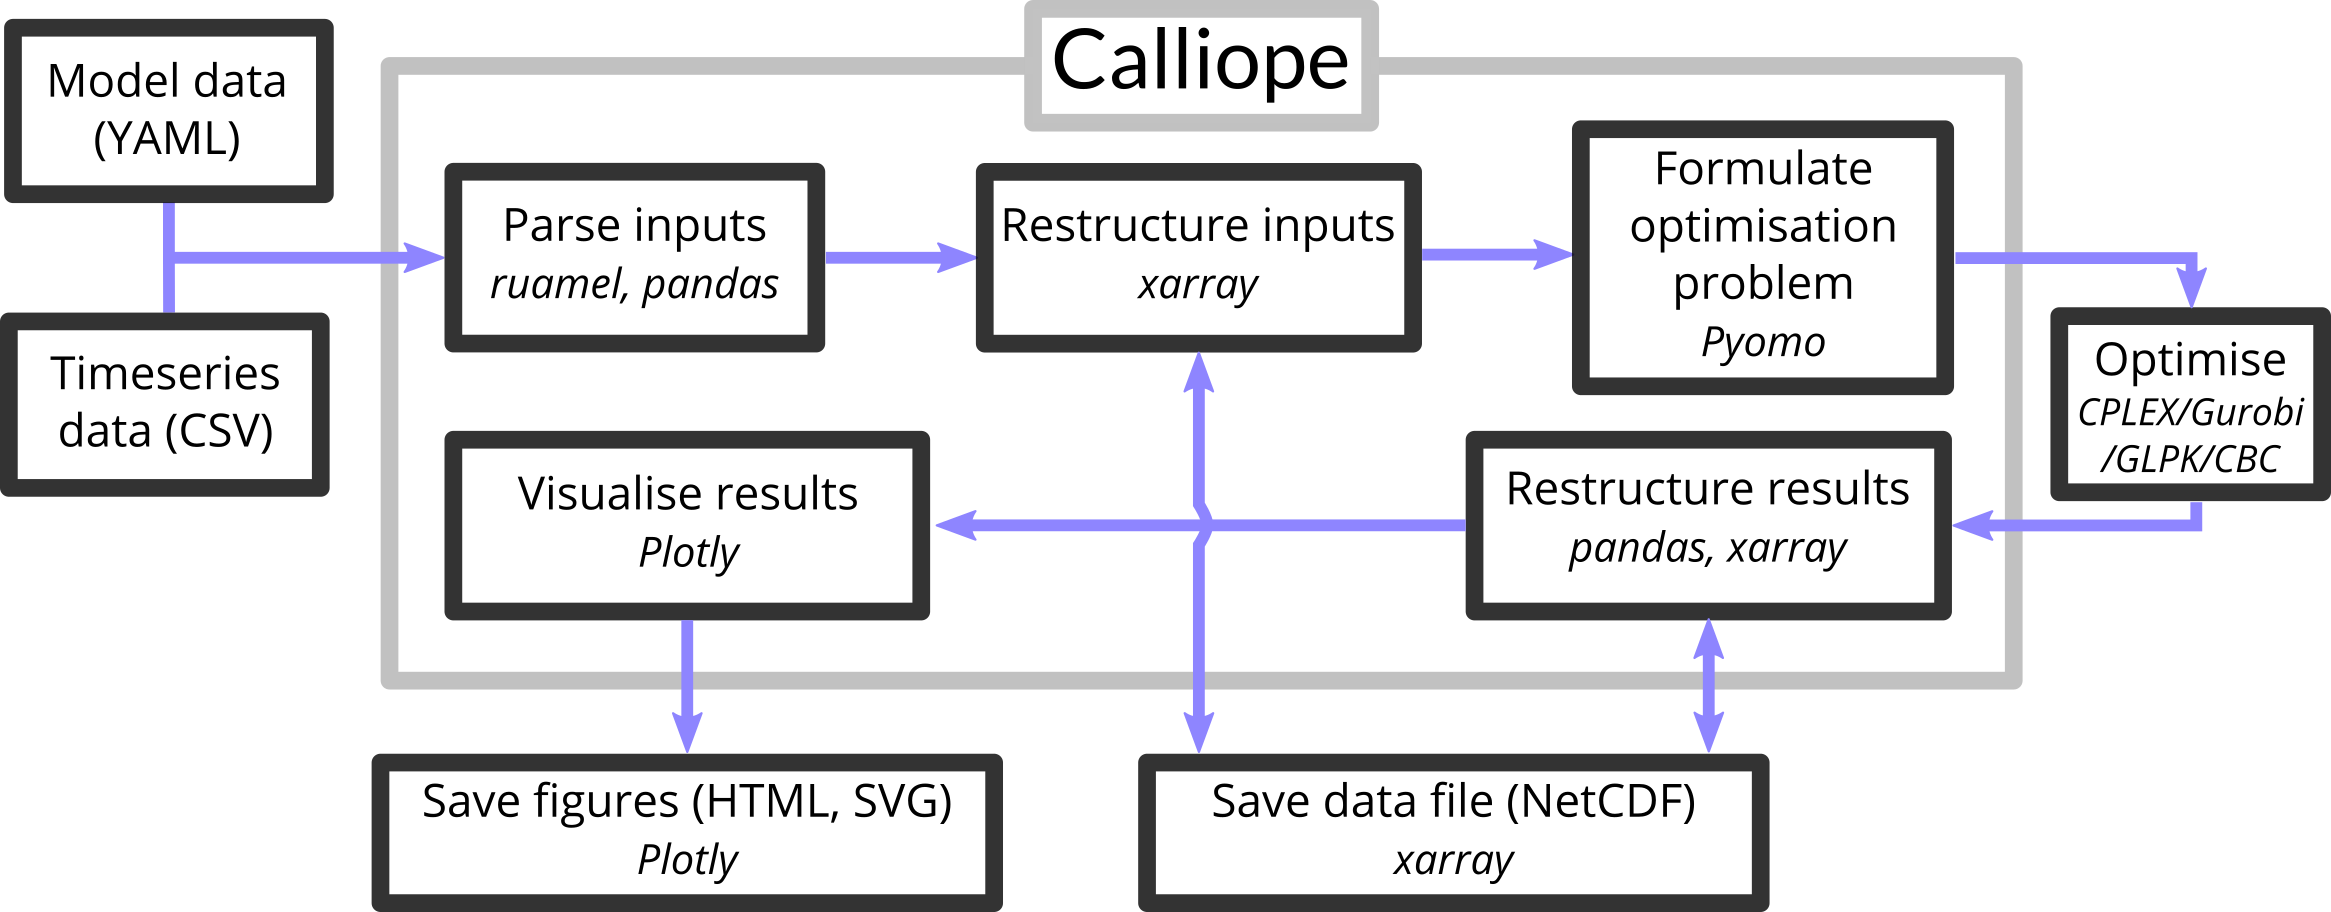
Calliope enables data stored in YAML and CSV files to be prepared for optimisation in a linear solver, and the results of optimisation to be analysed and/or saved. The internal workflow is shown below. The python packages ruamel.yaml and pandas are used to parse the YAML and CSV files, respectively. Xarray is then used to restructure the data into multidimensional arrays, ready for saving, plotting, or sending to the backend. The pyomo package is currently used in the backend to transform the xarray dataset into a pyomo ConcreteModel. All parameters, sets, constraints, and decision variables are defined as pyomo objects at this stage. Pyomo produces an LP file, which can be read in by the modeller’s chosen solver. Results are extracted from pyomo into an xarray dataset, again ready to be analysed or saved.
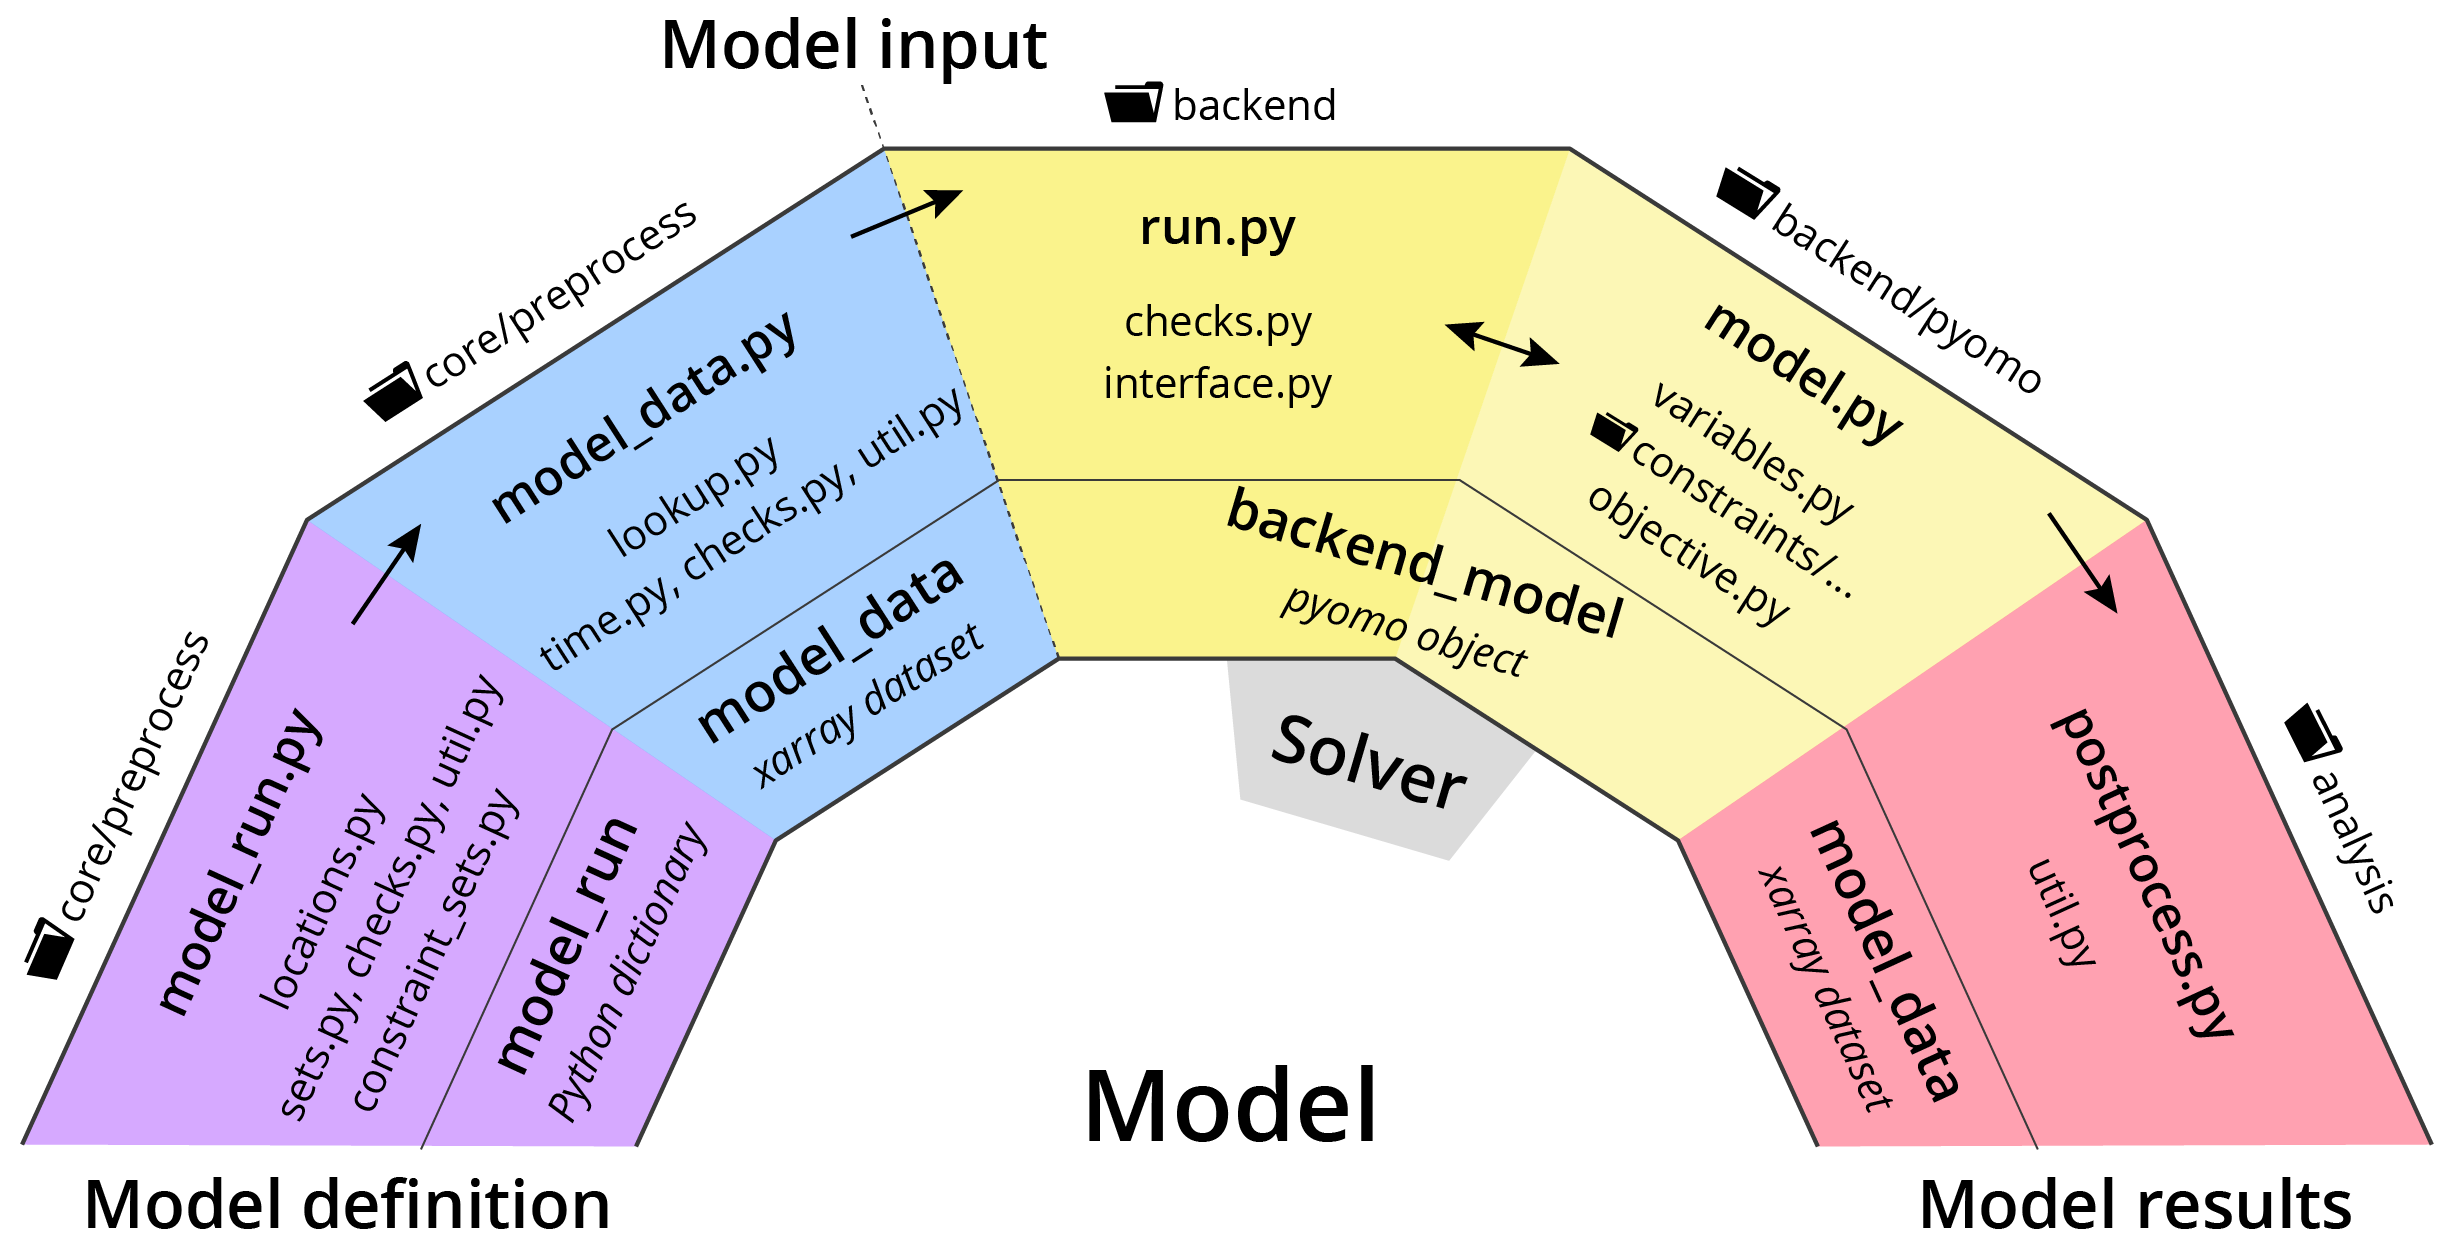
Taking a more detailed look at the workflow, a number of data objects are populated. On initialising a model, the model_run dictionary is created from the provided YAML and CSV files. Overrides (both from scenarios and location/link specific ones) are applied at this point. The model_run dictionary is then reformulated into multidimensional arrays of data and collated in the model_data xarray dataset. At this point, model initialisation has completed; model inputs can be accessed by the user, and edited if necessary.
On executing model.run(), only model_data is sent over to the backend, where the pyomo ConcreteModel is created and pyomo parameters (Param) and sets (Set) are populated using data from model_data. Decision variables (Var), constraints (Constraint), and the objective (Obj) are also initialised at this point. The model is then sent to the solver.
Upon solving the problem, the backend_model (pyomo ConcreteModel) is attached to the Model object and the results are added to model_data. Post-processing also occurs to clean up the results and to calculate certain indicators, such as the capacity factor of technologies. At this point, the model run has completed; model results can be accessed by the user, and saved or analysed as required.
Representation of Calliope internal implementation workflow. Five primary steps are shown, starting at the model definition and implemented clockwise. From inner edge to outer edge of the rainbow are: the data object produced by the step, primary and auxiliary python files in which functionality to produce the data object are found, and the folder containing the relevant python files for the step.
Exposing all methods and data attached to the Model object
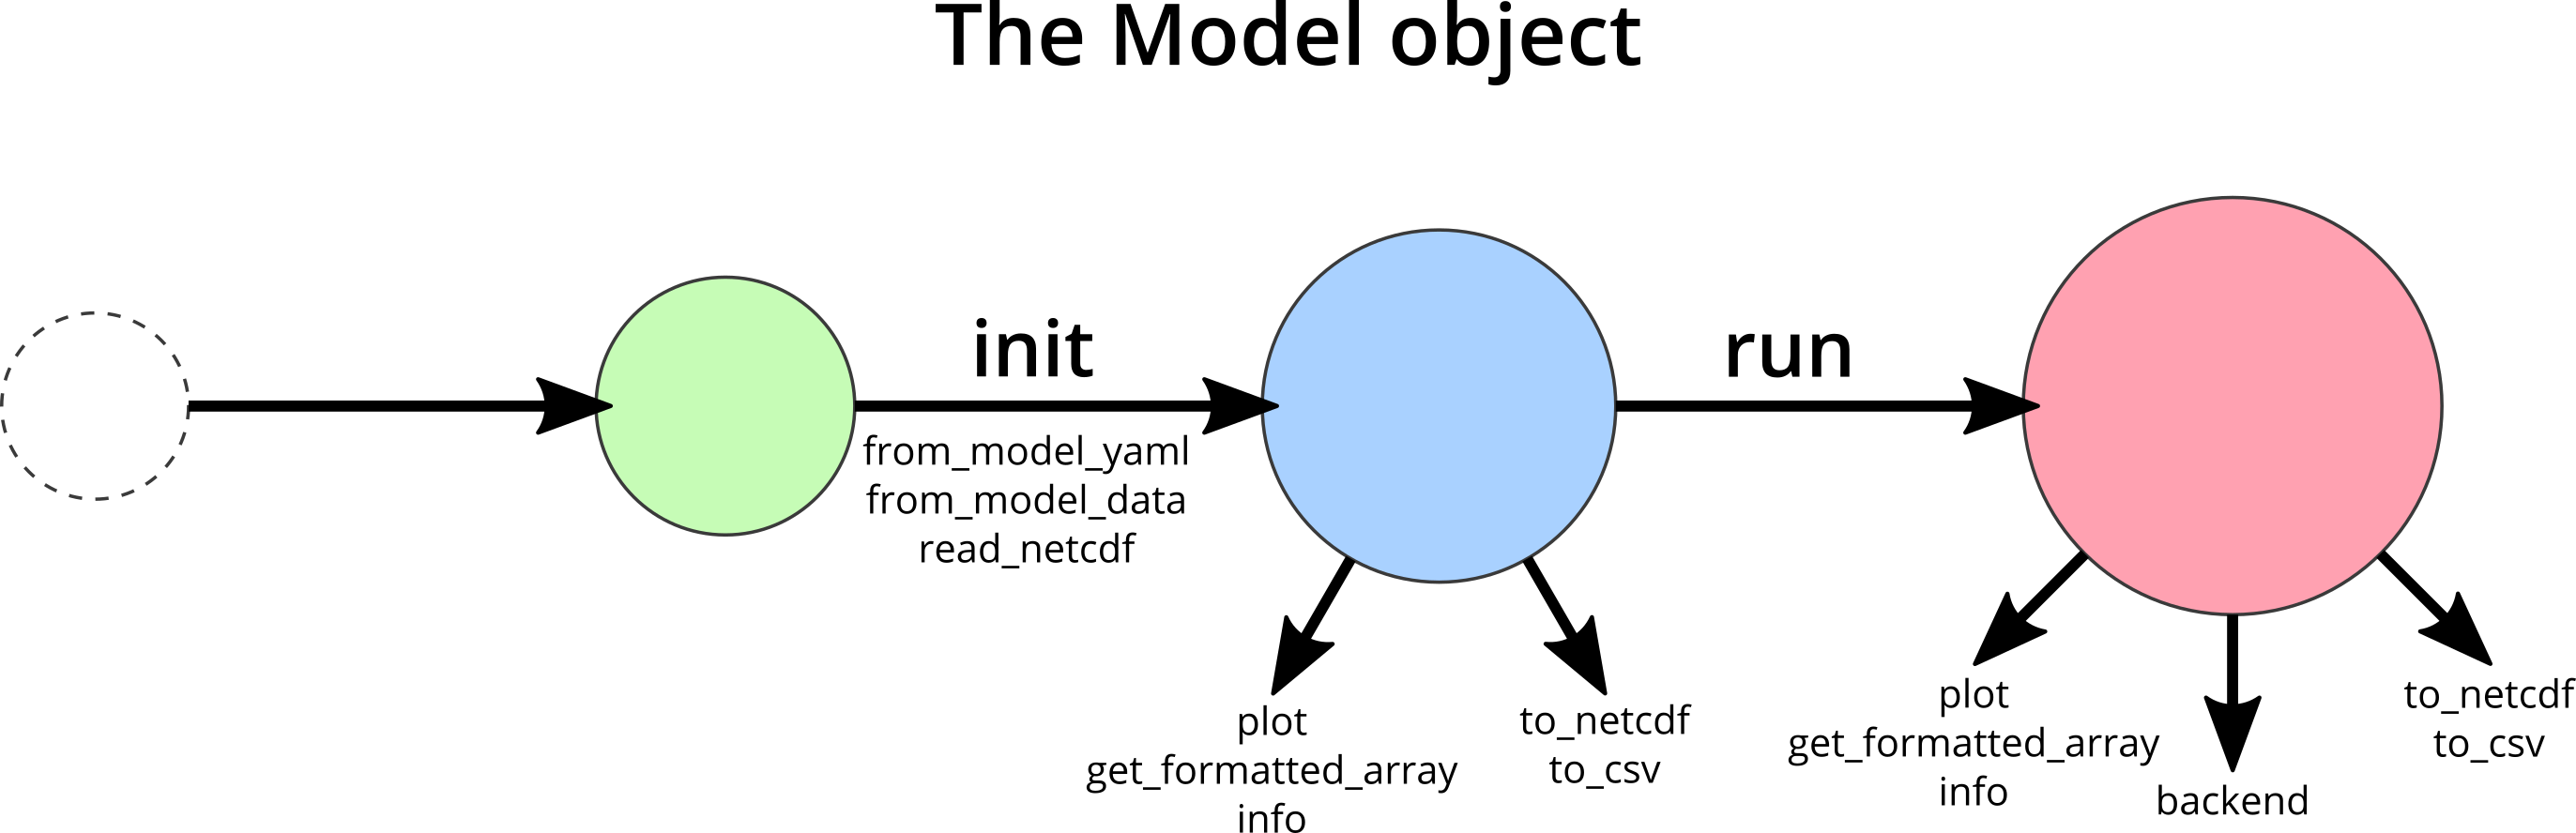
The Model object begins as an empty class. Once called, it becomes an empty object which is populated with methods to access, analyse, and save the model data. The Model object is further augmented once run has been called, at which point, the backend model object can be accessed, directly or via a user-friendly interface. The notebook found here goes through each method and data object which can be accessed through the Model object. Most are hidden (using an underscore before the method name), as they aren’t useful for the average user.
Representation of the Calliope Model object, growing from an empty class to having methods to view, plot and save data, and to interface with the solver backend.
Have a bug fix or feature addition you’d like to see in the next stable release of Calliope? First, be sure to check out our list of open and closed issues to see whether this is something someone else has mentioned, or perhaps has even fixed. If it’s there, you can add to the discussion, give it a thumbs up, or look to implement the change yourself. If it isn’t there, then feel free to open your own issue, or you can head straight to implementing it. The below instructions are a more detailed description of our contribution guidelines, which you can refer to if you’re already comfortable with using pytest and GitHub flows.
When you want to change some part of Calliope, whether it is the software or the documentation, it’s best to do it in a fork of the main Calliope project repository. You can find out more about how to fork a repository on GitHub’s help pages. Your fork will be a duplicate of the Calliope master branch and can be ‘cloned’ to provide you with the repository on your own device
If you want the local version of your fork to be in the same folder as your local version of the main Calliope repository, then you just need to specify a new directory name
In making changes to your local version, it’s a good idea to create a branch first, to not have your master branch diverge from that of the main Calliope repository
$ git branch new-fix-or-feature
Then, ‘checkout’ the branch so that the folder contents are specific to that branch
$ git checkout new-fix-or-feature
Finally, push the branch online, so it’s existence is also in your remote fork of the Calliope repository (you’ll find it in the dropdown list of branches at https://github.com/your_repository/calliope)
$ git push -u origin new-fix-or-feature
Now the files in your local directory can be edited with complete freedom. Once you have made the necessary changes, you’ll need to test that they don’t break anything. This can be done easily by changing to the directory into which you cloned your fork using the terminal / command line, and running pytest (make sure you have activated the conda environment and you have pytest installed: conda install pytest). Any change you make should also be covered by a test. Add it into the relevant test file, making sure the function starts with ‘test_’. Since the whole test suite takes ~25 minutes to run, you can run specific tests, such as those you add in
If tests are failing, you can debug them by using the pytest arguments -x (stop at the first failed test) and --pdb (enter into the debug console).
Once everything has been updated as you’d like (see the contribution checklist below for more on this), you can commit those changes. This stores all edited files in the directory, ready for pushing online
$ git add .
$ git checkout -m "Short message explaining what has been done in this commit."
If you only want a subset of edited files to go into this commit, you can specify them in the call to git add; the period adds all edited files.
If you’re happy with your commit(s) then it is time to ‘push’ everything online using the command git push. If you’re working with someone else on a branch and they have made changes, you can bring them into your local repository using the command git pull.
Now it is time to request that these changes are added into the main Calliope project repository! You can do this by starting a pull request. One of the core Calliope team will review the pull request and either accept it or request some changes before it’s merged into the main Calliope repository. If any changes are requested, you can make those changes on your local branch, commit them, and push them online – your pull request will update automatically with those changes.
Once a pull request has been accepted, you can return your fork back to its master branch and sync it with the updated Calliope project master
A contribution to the core Calliope code should meet the following requirements:
Test(s) added to cover contribution
Tests ensure that a bug you’ve fixed will be caught in future, if an update to the code causes it to occur again. They also allow you to ensure that additional functionality works as you expect, and any change elsewhere in the code that causes it to act differently in future will be caught.
Documentation updated
If you’ve added functionality, it should be mentioned in the documentation. You can find the reStructuredText (.rst) files for the documentation under ‘doc/user’.
Changelog updated
A brief description of the bug fixed or feature added should be placed in the changelog (changelog.rst). Depending on what the pull request introduces, the description should be prepended with fixed, changed, or new.
Coverage maintained or improved
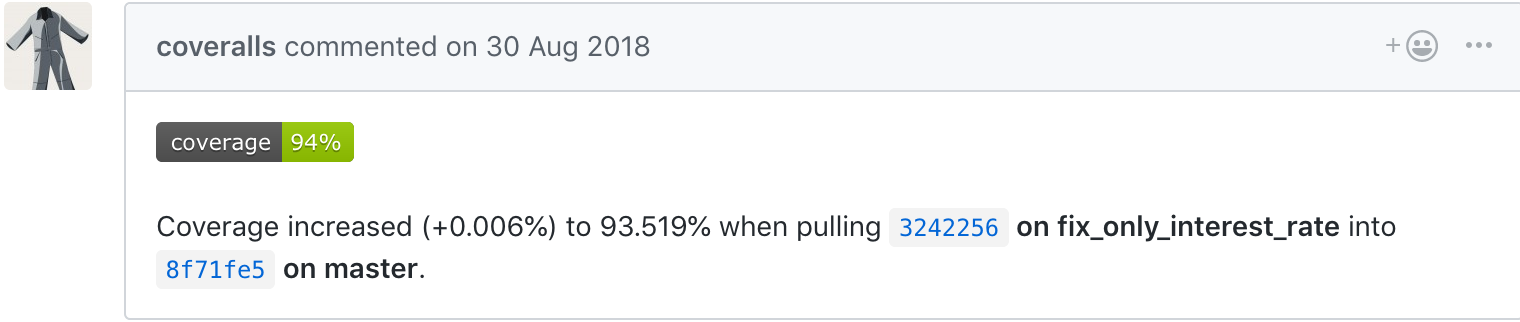
Coverage will be shown once all tests are complete online. It is the percentage of lines covered by at least one test. If you’ve added a test or two, you should be fine. But if coverage does go down it means that not all of your contribution has been tested!
Example of coverage notification in a pull request.
If you’re not sure you’ve done everything to have a fully formed pull request, feel free to start it anyway. We can help guide you through making the necessary changes, once we have seen where you’ve got to.
Update changelog, adding a new vXXXX-dev heading, and update _version.py accordingly, in preparation for the next master commit
Update the calliope_version setting in all example models to match the new version, but without the -dev string (so 0.6.0-dev is 0.6.0 for the example models)
Note
Adding ‘-dev’ to the version string, such as __version__='0.1.0-dev', is required for the custom code in doc/conf.py to work when building in-development versions of the documentation.